Wednesday, April 15, 2015

We have moved in, but I am trying to keep the blog sequence going

It's April 2015, and we have moved in since last two months. However, I am going to try and add various entries to keep the sequence going.

July 2014 is when we had finished the outside plaster. It was time to start internal work. Most of the challenges were faced once we moved inside and started detailing work.


Slate Cladding


Front Facade

Thursday, July 17, 2014

Videos of the progression of work

First one is how the structure arose from excavated earth


Next one shows the foundation


Progress through Pictures

We are in the middle of the July 2014. Thanks to delayed rains this year, we were able to finish all outside plaster and other work without much hindrance. It has shaped up quiet nicely. All the external design elements are quiet visible now! Effort is on to ensure we get similar results from internal finishes...

That's what the front facade looks like!

Stone cladding - found something we liked after a long search!

Overhand on Parapet - To protect walls from water streaks...

Guy's sitting on molten lava! naah.. just cutting the girder

Elevator - Desi jugaad style!

Elevator motor - Desi jugaad style!

Thursday, April 24, 2014

Innovations in Construction

I have written about new techniques we employed in this project here and there. I thought it would be a good idea to list those out in one place.
  1. Concreting done here is almost Self Compacting Concrete. It is low in porosity and high in density. It has strength of almost M35-40. It also has enhanced flexural strength.
  2. Plastering is done with constant water cement ratio, with added plasticizer. Composition is machine mixed concrete, resulting in very even distribution of all components of the plaster.
  3. Block work is done with Masonry Bonding Mortar. This results in high-strength bond between the blocks. We need less than 5mm of bonding material between the blocks resulting in consistent lines.
  4. Blocks reinforced at sill level with 10mm bars. This is done by making grooves in blocks so that it doesn't impact the height of the masonry. 


  5. Window cladding done with black granite. Corner joints of granite done with special grooving so that each stone supports the other creating a long lasting joint.


  6. Cantilever parapet to protect walls from rain streaks. 


  7. Wooden door frame members notched and joined with araldite adhesive.

Wednesday, April 2, 2014

It is taking shape...

Its in to the new financial year for India and the building is showing traces of nearing completion. We are about two months behind the schedule we had set in last September, thanks to the rain gods early on, then the holidays, the dispute with contractor and holidays again...

Last time when I updated the blog entry, our first slab was done. Now two more slabs and the stair cabin, elevator shaft top and overhead tank later, we see the end of the tunnel now :-) Floor-wise, here is the status.

Ground Floor:

  • Electrical ducting done with boxes for outlets inserted
  • Air-condition provisioning done
  • Steel structure for supporting spider glazing on drawing room front done
  • 1st coat of internal plaster done
  • Sample window cladding in black granite done
  • All door frames installed
  • Added steel rods in grooves at sill level to ensure cracks do not originate in masonry
Steel rods added at Sill Level in Masonry


Helical Staircase from Ground Floor to First


First Floor:
  • Masonry work mostly done
  • Electrical boxes and ducts done
Huge beam supporting Spider glazing and cantilever
of vaulted 


Second Floor:
  • Masonry work ongoing
Terrace Floor:
  • Decided to put architectural projection all around the parapet to protect walls from rain streaks
  • Completed structural aspect


Triangle overhead water tank
Projection to protect facade at parapet level on terrace 


Friday, January 31, 2014

Another stall! Gives time to reconsider the design

After the first slab was done, only stairs portion was remaining to be cast. However, our masonry contractor started acting up again and wanted funds released even before the work was complete. He had totally lost interest in doing this project. Only because of the person he had appointed to do all the RCC framework who was immensely efficient and professional, we were tolerating his antiques.

However, we had had enough and decided to fire him from the job. We were hoping that the person that was doing the actual work would stay to complete the work, but this guy just didn't let him work. So, the entire team cleaned up the premises and left.

It took good 4 weeks before the new team started work! Yes, we have bags full of ice on our heads...

This time coincided with the visit of our architect. We looked at the design and started considering a couple of changes.

1. Moving the entry area out of the front door:
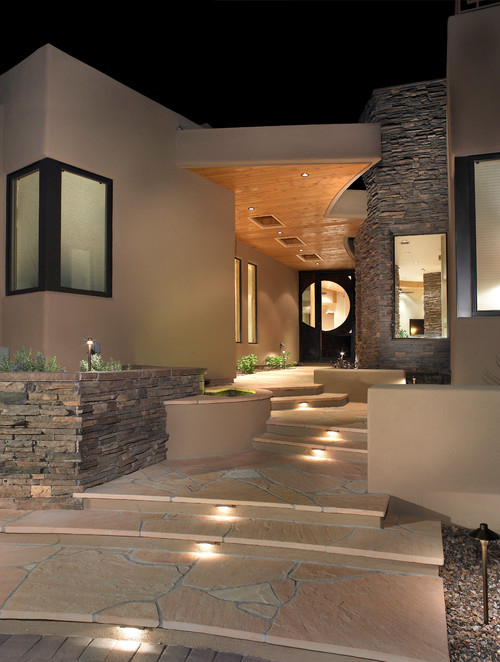
Once we saw how small the entry area will be, we thought of moving the door to the angled wall. This would make entry into the house very awkward. So, our architect suggested we move the entry area out of the front door. This allows for large entrance porch that can be decorated to give a very welcoming feeling. Something that looks like this:


Our Ground Floor design was updated to accommodate this change. We brought the entrance door inwards next to the lift shaft.


.

2.Open kitchen layout:
Once all the centering supports opened up, we saw how beautiful the helical staircase would look at the ground floor level if we opened up the kitchen. 
Pros: Entire ground floor great room layout opens up, gives very airy feeling to the kitchen, living, dining area. Allows for a large island that was on our original wishlist.
Cons: Lose lot of cabinet space and storage space. Also, as soon as you enter the house, you see the open kitchen. This is actually a big point going against this design.
All in all, we considered it, but decided against doing something like this and decided to go for the original closed kitchen design.
3.  Drawing room glass facade:
Here we had a real tough time finalizing details. Our architect felt that although they had given original design of glass facade with spider glazing, we should try and avoid it. We should have some different kind of facade where we do not use spider hardware. For reference, here is our original design:
Glass facade on the left looks very clean, giving perfect proportions to the elevation.
However, if we want to get rid of the spider design, we need a horizontal member to support glass on top. And make sure we get maximum possible size of glass above the member. New render looked something like this. We also incorporated wall till the sill level. 
 

Pros: New design gets rid of spider hardware that might be outdated in coming years.
Cons: Horizontal MS member compromises the clean look that we so desperately want in that area.
Final verdict is to stick to the spider design with glass going till about 8" above the ground level.


1st Slab Done!

It's 19th December 2013 and the first slab of our building is cast.

Process before casting involved lot of centering work and decision making regarding how the sunk slabs will look like so that we don't have weird steps in the ceilings. We put the sunk slab over the entire kitchen although we only needed sunk for the part of it that was going to be bathroom above the kitchen.

Slab casting itself was relatively simple process considering the amount of work that went into constructing the Steel framework. Miller came with a pump, and entire slab was cast in a matter of hours once everything was in place.

Of course, we had traditional food of "chavanu" and "ladu" for people doing the slab work. Some pictures from the casting process: